本文最后更新于:2021年2月5日 下午
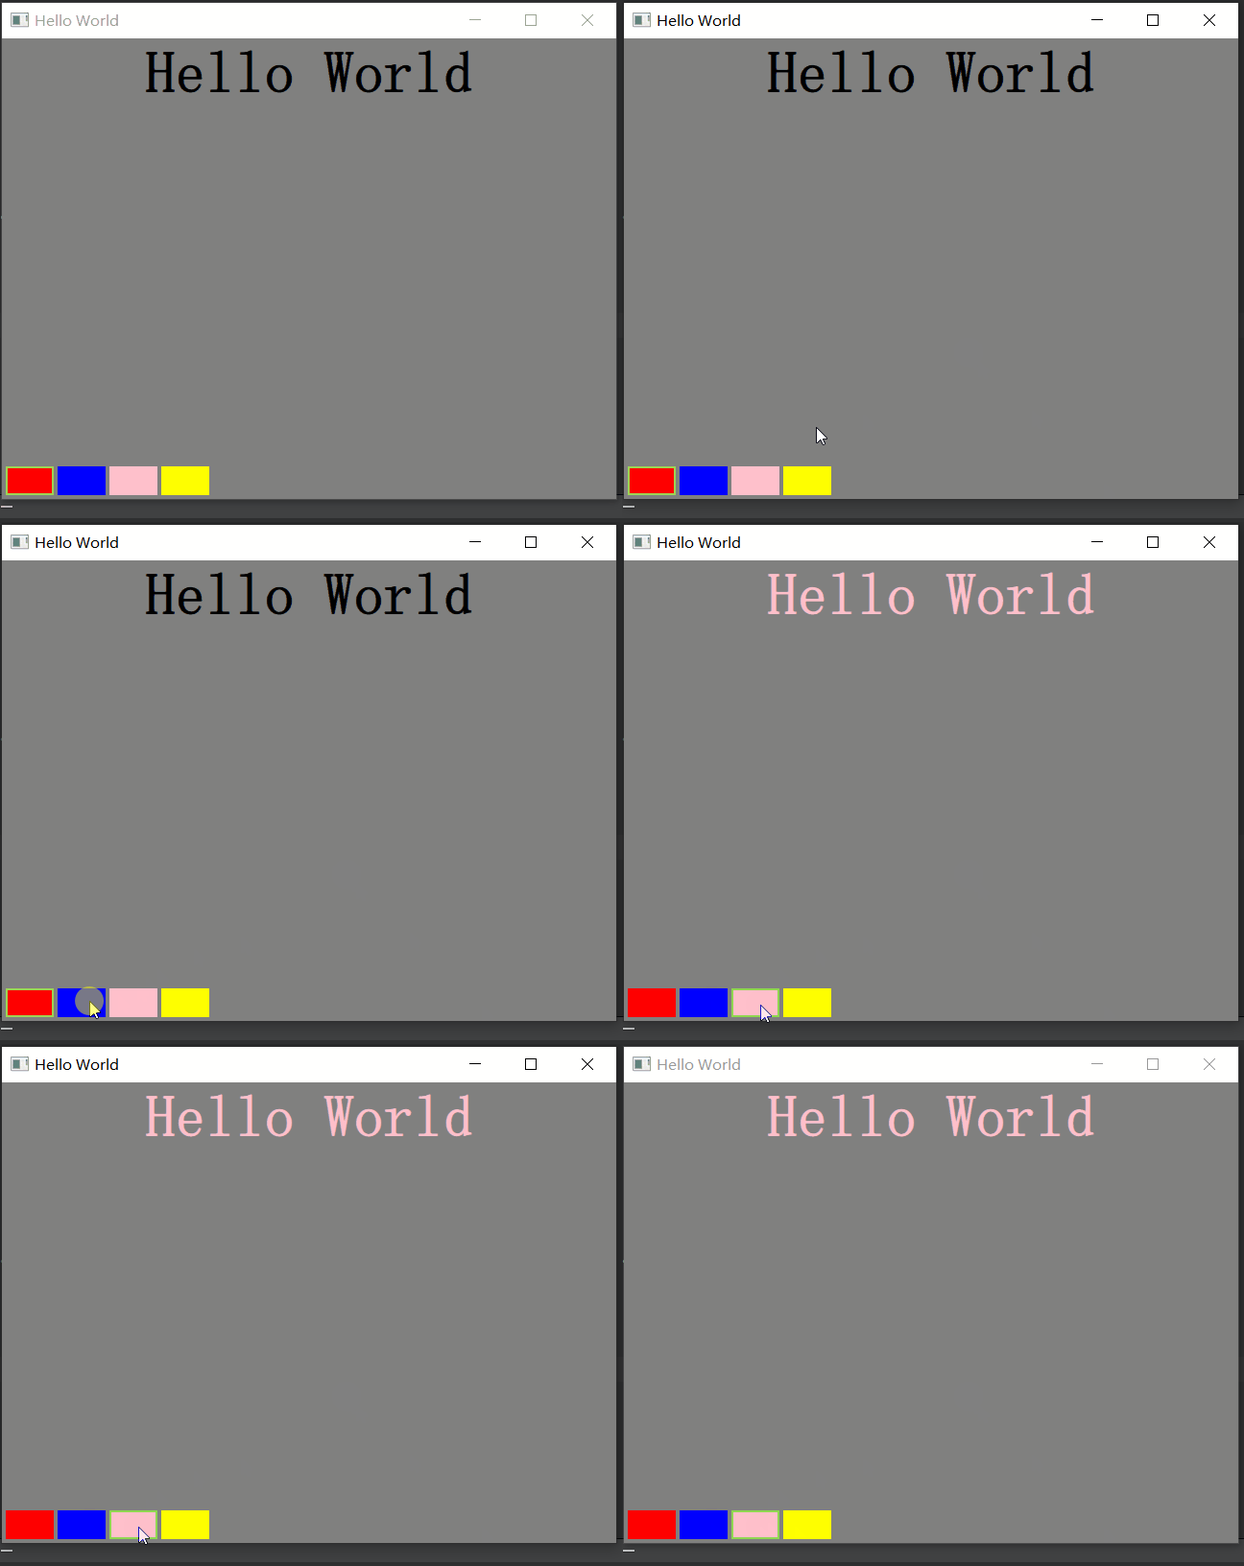
这篇文章来分享一个有 Qt Quick 写的颜色提取小程序,实现的功能很简单,在窗口左下角放置几个不同颜色的矩形,每个矩形的颜色不同,在窗口顶部中间的位置放置一个文本 Text ,通过点击不同颜色的矩形来给文本设置不同的颜色。
该程序中用到的知识有 Qt Quick 中的 Component(组件)、自定义信号、connect等,具体看下方代码:
main.cpp
1
2
3
4
5
6
7
8
9
10
11
12
13
14
15
16
17
18
19
20
| #include <QGuiApplication>
#include <QQmlApplicationEngine>
int main(int argc, char *argv[])
{
QCoreApplication::setAttribute(Qt::AA_EnableHighDpiScaling);
QGuiApplication app(argc, argv);
QQmlApplicationEngine engine;
const QUrl url(QStringLiteral("qrc:/main.qml"));
QObject::connect(&engine, &QQmlApplicationEngine::objectCreated,
&app, [url](QObject *obj, const QUrl &objUrl) {
if (!obj && url == objUrl)
QCoreApplication::exit(-1);
}, Qt::QueuedConnection);
engine.load(url);
return app.exec();
}
|
ColorPicker.qml
1
2
3
4
5
6
7
8
9
10
11
12
13
14
15
16
17
18
19
20
21
22
23
24
25
26
27
28
29
30
31
32
33
34
35
36
37
38
39
40
| import QtQuick 2.0
Rectangle {
id: colorPicker
width: 50
height: 30
signal colorPicked(color clr)
function configureBorder(){
colorPicker.border.width = colorPicker.focus ? 2 : 0
colorPicker.border.color = colorPicker.focus ? "#90D750" : "#808080"
}
MouseArea {
anchors.fill: parent
onClicked: {
colorPicker.colorPicked(colorPicker.color)
mouse.accepted = true
colorPicker.focus = true
}
}
Keys.onReturnPressed: {
colorPicker.colorPicked(colorPicker.color)
event.accepted = true
}
Keys.onSpacePressed: {
colorPicker.colorPicked(colorPicker.color)
event.accepted = true
}
onFocusChanged: {
configureBorder()
}
Component.onCompleted: {
configureBorder()
}
}
|
main.qml
1
2
3
4
5
6
7
8
9
10
11
12
13
14
15
16
17
18
19
20
21
22
23
24
25
26
27
28
29
30
31
32
33
34
35
36
37
38
39
40
41
42
43
44
45
46
47
48
49
50
51
52
53
54
55
56
57
58
59
60
61
62
63
64
65
66
67
68
69
70
71
72
73
74
75
76
77
78
79
80
81
82
83
84
85
86
87
88
89
| import QtQuick 2.12
import QtQuick.Window 2.12
Window {
width: 640
height: 480
visible: true
title: qsTr("Hello World")
Rectangle {
anchors.fill: parent
Text {
id: coloredText
text: qsTr("Hello World")
anchors.horizontalCenter: parent.horizontalCenter
anchors.top: parent.top
anchors.topMargin: 4
font.pixelSize: 32
}
function setTextColor(clr){
coloredText.color = clr
}
ColorPicker {
id: redColor
color: "red"
focus: true
anchors.bottom: parent.bottom
anchors.bottomMargin: 4
anchors.left: parent.left
anchors.leftMargin: 4
KeyNavigation.right: blueColor
KeyNavigation.tab: blueColor
onColorPicked: {
coloredText.color = clr
}
}
ColorPicker {
id: blueColor
color: "blue"
anchors.left: redColor.right
anchors.leftMargin: 4
anchors.bottom: parent.bottom
anchors.bottomMargin: 4
KeyNavigation.left: redColor
KeyNavigation.right: pinkColor
KeyNavigation.tab: pinkColor
}
ColorPicker {
id: pinkColor
color: "pink"
anchors.left: blueColor.right
anchors.leftMargin: 4
anchors.bottom: parent.bottom
anchors.bottomMargin: 4
KeyNavigation.left: blueColor
KeyNavigation.right: yellowColor
KeyNavigation.tab: yellowColor
}
ColorPicker {
id: yellowColor
color: "yellow"
anchors.left: pinkColor.right
anchors.leftMargin: 4
anchors.bottom: parent.bottom
anchors.bottomMargin: 4
KeyNavigation.left: pinkColor
KeyNavigation.tab: redColor
}
Component.onCompleted: {
blueColor.colorPicked.connect(setTextColor);
pinkColor.colorPicked.connect(setTextColor);
yellowColor.colorPicked.connect(setTextColor);
}
}
}
|
演示

